Add Vehicles in RNDB
If you are using the Demographic Sync Override to disable syncing your vehicles from ZOLL emsCharts to RNDB, you must add your vehicles in RNDB.
-
On a RN admin workstation, launch RescueNet Administration and go to Crews, Vehicles, and Units > Vehicles > Vehicles.
-
Search the list for your vehicle first to make sure it does not already exist in RNDB.
-
If the vehicle does not already exist, click Add. If it does exist, you can edit it to add or update any information and can skip to step 7 to add the state ID.
-
Enter at minimum the name (in the Vehicle field) and in the Type field, select the vehicle type.

-
Click OK.
-
Click Done. You can close RN Admin.
-
Launch ZOLL Data Management Console (ZDMC).
Note: Field Data Workstation components must be installed. If you do not have a machine with ZDMC, it can be installed on a RNDB workstation using the RN ePCR Enterprise installer.
-
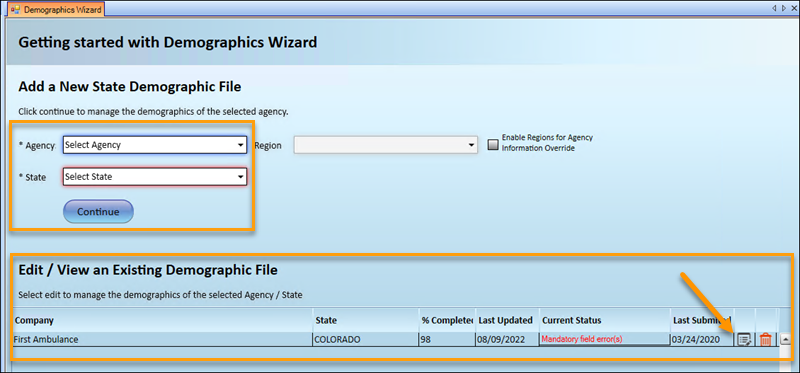
Go to Demographics > Demographic Wizard and you will see your existing demographic files in the 'Edit / View an Existing Demographic File' section. Use the edit icon
 to open your state demographic file. The file should be for your service's home state listed in the State field in emsCharts Configuration > General.
Note: If you don't have an existing demographic file for your state, you can add a new one by selecting the Agency name and State from the drop-downs and clicking Continue.
-
Select Vehicles to see a list of all the vehicles you have added in RN Admin.
-
All vehicles missing a state ID will have a red edit icon
 . Click the edit icon to add a state ID. You can also use the edit icon to update a state ID for a vehicle that already has one.
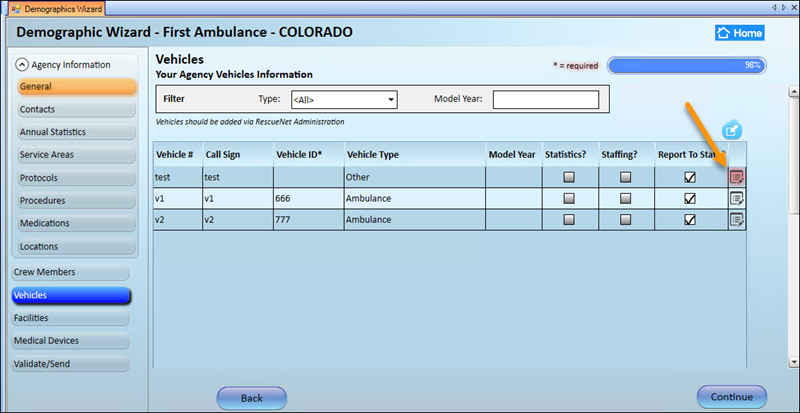
-
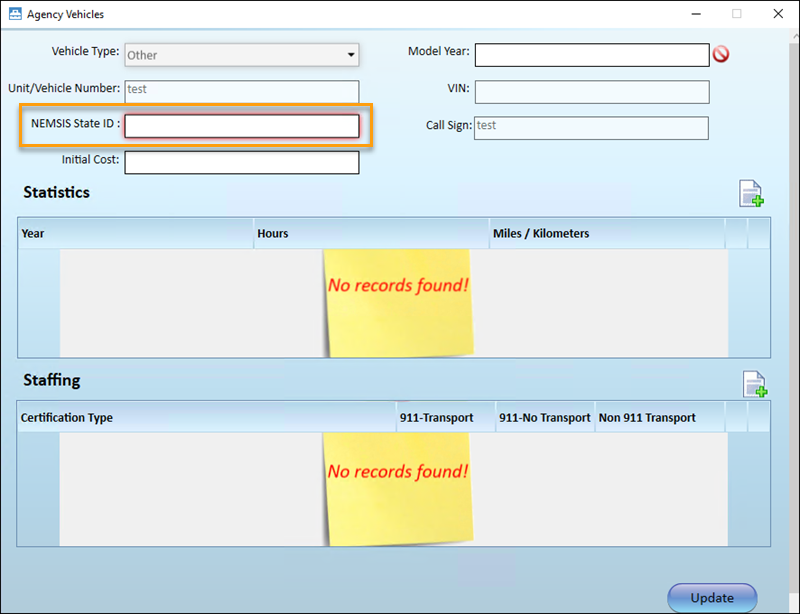
Enter the state ID in the 'NEMSIS State ID' field. The value must match the home state ID configured for the vehicle in ZOLL emsCharts.
Note: The state ID does not have to be state issued, it can be made up, as long as it matches the state ID configured for the matching vehicle in ZOLL emsCharts.
-
Click Update.
-
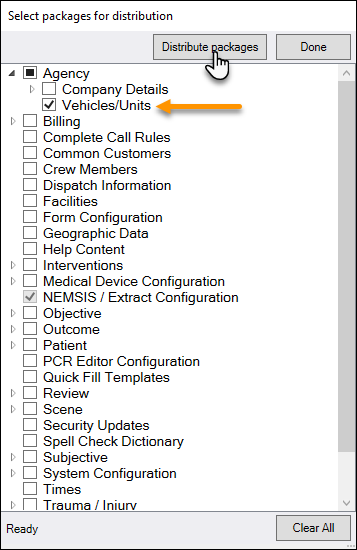
In the top ZDMC toolbar, click Tools > Distribute Packages.
-
In the 'Select packages for distribution' window, check the Agency > Vehicles/Units box and click Distribute packages.
-
When the system finishes generating packages, click Done. You can close ZDMC.
If you are using Demographic Sync Override for crew members, you will need to add your crew members to RNDB.